
Angel Food Cake ~ 天使蛋糕


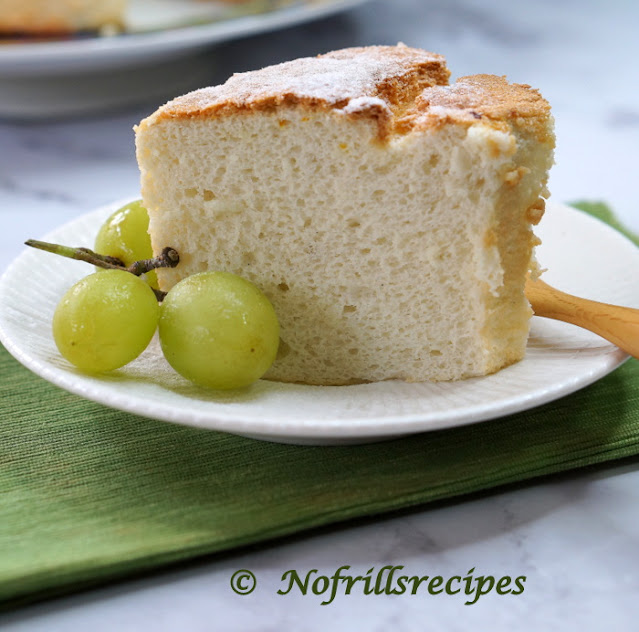
Angel Food Cake is a meringue based sponge cake with no butter, no oil and no baking powder or any rising agent.  It's aerated texture comes from the beaten egg whites.  This cake is soft, cloud-like, pillowy with a slight tinge of orange and is great to serve as dessert with some whipped cream, berries and in my case I chose grapes.


Angel Food Cake ~~  天使蛋糕

Ingredients (A)

  • 100 gm superfine flour  (plain flour also can be used)
  • 90 gm caster sugar   
(B)                                                        
  • 1.1/4 cups egg whites (approx. from 9 'L' eggs) 
  • 90 gm caster sugar 
  • 1/4 tsp salt
  • 1.1/2 tsp cream of tartar OR 2.1/2 tsp lemon juice       
  • 1/2 tsp vanilla paste or 1 tsp vanilla essence (I used vanilla paste)
Method
  1. Pour the egg whites into a clean mixing bowl.  (Egg whites should be at room temperature for them to inflate well).  Set aside for about 30 mins.
  2. Mix the flour with the caster sugar, sift thrice.  Set aside.
  3. Add lemon juice, salt and vanilla paste into the mixing bowl of egg whites.  Beat till foamy and soft peaks, then gradually add in the caster sugar, a tablespoon at a time.  Adding sugar all at once will deflate the egg whites.
  4. Continue beating till stiff peaks but not dry.
  5. Sift in the flour and sugar mixture a little at a time.  Fold in lightly.
  6. Add in the orange zest.   Fold in till all the flour mixture has been fully incorporated.
  7. Scoop batter into a 23 cm ungreased chiffon/tube pan.  Smoothen the surface with a spoon or spatula.  
  8. Use a skewer to swirl the batter to break up any air bubbles.
  9. Bake in a preheated oven @ 170 deg.C for 35 to 40 mins. till golden brown.  Remove from the oven and immediately invert the cake to let it cool completely.  Unmould the cake by hand.
  10. Cut the cake with a serrated knife and serve with a dollop of soft whipped cream, berries or dust the cake with some icing sugar before serving.
      

Comments

Popular posts from this blog

Steamed Pork Belly with Shrimp Paste ~ 蝦醬蒸五花腩

  This is an extremely delicious dish to go with white rice or even plain porridge.  You don't have to add in big spoonfuls of shrimp paste for it is salty but some sugar is needed to enhance the taste.  Adding in Shaoxing wine will definitely bring the taste up to the next level.  You'll definitely need more rice to go with this dish..... trust me! Steamed Pork Belly with Shrimp Paste  ~   蝦醬蒸五花腩 Ingredients 300 gm pork belly, cut thinly (with or without skin) 1.5 Tsp Shrimp paste  2 Tsp sugar 1 Tbsp Shaosing wine 3 slices of ginger, chopped  1 Tbsp cornstarch and 1.5 to 2 Tbsp water 1 tsp oil (so that the meat will not stick to each other) a bit of pepper Chillies and spring onions, chopped for garnishing Method Cut up the pork belly thinly. Mix in the chopped ginger. Mix the shrimp paste with wine to dilute it. Pour the shrimp paste mixture into the pork belly. Add in some pepper, sugar, cornstarch, oil and water.  Mix till well ...

Braised Pork Belly with Lotus Root 莲藕焖猪肉

This is a very simple pork belly dish cooked with fermented bean curd and young lotus root.  I like that the lotus root stays crunchy and blends well with  the equally crispy wood ear fungus.  A comforting dish to serve with a bowl of hot white rice! Recipe for Braised Pork Belly with Lotus Root Ingredient 300 gm pork  belly, cut into bite size 150 gm young lotus root, sliced 4 pips garlic, smashed 20 gm wood ear fungus, soaked, stemmed, cut into strips 2 pices of Nam Yue (fermented bean curd) 1 tsp dark soya sauce 2 tsp Shaoxing wine 3 cups water Salt and sugar to taste Method Saute the garlic with some oil till fragrant, add in the pork belly, stir-fry. Add in the mashed fermented bean curd, mix well and toss in the wood ear fungus. Add in water, dark soya sauce, simmer till meat is tender and cooked and sauce slightly reduced. Toss in the sliced lotus root, ...

Char Siew Pau ~ 蒸叉烧包

I have been itching to try out a Pau recipe and vaguely remember that I did make it once, long, long ago.  So I  got hold of my old file of recipes and finally managed to retrieve it.  I did it recently and must say that I'm satisfied with the result.  The texture of the Pau was soft and a bit chewy, wholesome and filling too.  Naturally, they didn't look so nice and round like the ones sold in the dim sum restaurants, but nonetheless I think homemade ones can be just as delectable as well.