

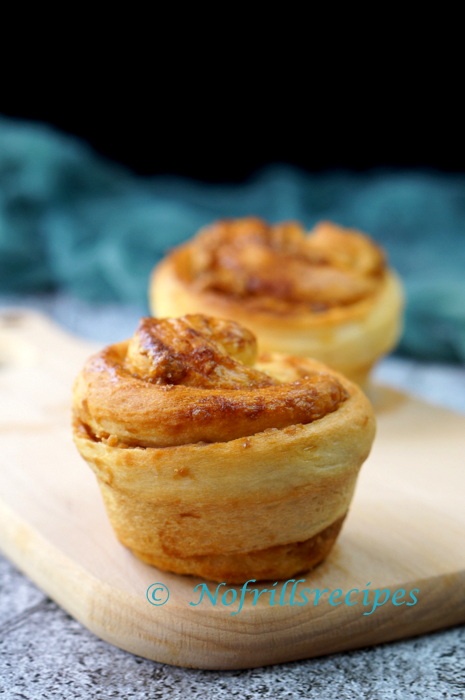
I made these Peanut Butter Buns after watching 'Qiong cooking' video on youtube. I didn't follow her recipe to the 'T' because her recipe called for 190 ml ice water and I only used 150 ml as it was sufficient to moisten and knead the dough. I didn't cut the pieces of dough into 3 and braid them but instead just roll them up and place them in the greased muffin pan. The buns had a sugary crunchy crust and they were delicious when eaten warm. I freezed 4 buns, defrosted and heated them up in the oven toaster the next day. They were good as if freshly baked. Great to go with a cup of your favourite hot beverage.

Peanut Butter Buns ~ 花生酱面包 (adapted from 'here' )
Ingredients
- 300 gm High Protein or Bread flour
- 1 tsp dry yeast
- 1/2 tsp salt
- 20 gm milk powder
- 30 gm caster sugar
- 150 ml ice water (may need a bit more or a bit less)
- 30 gm softened butter
- Peanut butter, crunchy or creamy
- 1 egg plus 2 tsp water
- Raw sugar to sprinkle (optional)
Method
- In a mixing bowl, add in high protein flour, salt, milk powder, sugar and yeast on one side, mix with the dough hook. Add in the ice water gradually and knead with the dough hook. Once a soft dough is formed, add in the softened butter and knead. Once the dough is not sticky, pinch a bit of dough to check for window pane test.
- Shape the dough into a ball, place it in an oiled bowl, cover with cling wrap and let proof in a warm place till doubled in size, approx. 1 hour.
- Poke a hole in the dough with your index finger and if the indentation stays, the dough is ready for shaping.
- Place the dough onto a pastry mat and press out the air, roll out into a rectangle about 12 inch x 20 inch. Spread a thin layer of peanut butter onto the dough, roll up 1/3 and overlap by the other 1/3. Flatten and roll the dough, cut into 12 pieces. Stretch 1 piece of dough lightly and roll it up. Place the roll of dough into a greased muffin pan. Repeat with the remaining pieces of dough and place into the muffin pan.
- Cover the muffin pan with cling wrap and let proof in a warm place till doubled in size, approx. 1 hour.
- Apply egg wash on the buns and sprinkle with some raw sugar.
- Bake in a preheated oven @ 180 deg. C for 20 mins. till golden brown, Remove from the oven and take out the buns to cool completely on a wire rack.
- Yield : 12 buns
Note :
1. Window pane test
Stretch a small piece of dough gently and if it can stretch thinly without tearing, the dough has passed the window pane test. Then the dough is ready for proofing.
2. Yeast activity may decrease when it comes into direct contact with salt. Small amounts of salt will not kill the yeast but will slow its growth thus slowing the rise in the dough.
Comments
Post a Comment
Thanks for dropping by. Please click on 'Anonymous' if you do not have a blog but do leave your name after the comment because I would like to know who you are.